Are you overwhelmed by all the different methods of starting a garden? Unsure how to budget your time and money so the process feels doable instead of stressful?
You’ve probably heard about raised garden beds, in-ground no-till methods, grow bags, pots, and even self-watering buckets. Each of these can work — the key is understanding how they fit your goals, your space, and your budget.
Many new gardeners dive in headfirst without realizing how much time and energy a full-scale garden can take. The good news is you don’t have to start big. You can grow a few tomatoes and peppers in a 4×4-foot plot, or begin with just a couple of containers on a patio. Starting small builds confidence and experience — lessons that no book or blog post alone can teach.
In this guide, we’ll explore the pros and cons of the most common backyard gardening methods and help you decide which approach works best for you. Let’s dive in and discover the best way to start a garden that’s both successful and sustainable.
If you’re just starting out, this post is part of my larger guide, Backyard Gardening Basics: Getting Started. That’s where I pull everything together — from soil prep and planting to tools and layout — so you can build a strong foundation and avoid some of the mistakes I made early on.
Raised Beds: Elevated and Accessible

Raised garden beds are a favorite for creating a beautiful, well-structured garden. They offer many perks, though there are a few downsides, especially if you are on a tight budget. They also reduce bending and kneeling, which helps your knees and back.
You will find many styles to choose from, including tall designs that nearly eliminate bending or kneeling. Raised beds bring a clean, structured approach to gardening. They can feel slightly restrictive, but they are often easier to manage than traditional in-ground gardens.
Here are some of the key benefits of raised beds:
- Soil control: You aren’t limited by your existing ground soil. You can create the perfect mix for healthy growth.
- Drainage and health: A custom mix ensures good drainage and a thriving environment for your plants.
- Custom conditions: Two beds can be set up differently. For example, tomatoes (pH 6.0–6.8) in one and blueberries (pH 4.5–5.5) in another.
- Weed control: Weeds are far easier to manage in a raised bed.
- Pesky pests: Keeping those pests away is simpler, since you can build a barrier between the ground and your plants.
- Extended season: Soil warms faster in spring, which means earlier planting and a longer growing season.
- Visual appeal: Raised beds add structure and beauty to your garden, giving it a neat, organized look.
Flexibility of placement: They can be placed on grass, gravel, or even pavement since they don’t rely on native soil.
Raised beds, like any solution or method, do come with drawbacks that require consideration:
- Upfront cost: Raised beds require more investment than other methods. You’ll need to buy or build the bed and fill it with soil and filler materials.
- Maintenance: Wood eventually rots, and even metal beds show wear over time. Expect repairs or replacements down the road.
- Faster drying: Soil in raised beds dries out quicker, especially in hot weather. Mulch, shade cloth, or lighter-colored materials can help retain moisture.
- Size limits: You’re restricted to the dimensions of your beds, which may not suit sprawling crops.
- Nutrient leaching: Over time, nutrients can wash out of the soil. Regular mulching and amendments (like compost or well-rotted manure) keep beds productive.
In my own garden, I use both wooden and metal raised beds. The wooden ones have lasted more than five years with only minor patching, while the metal beds have shown almost no wear after four years.

Building Your Own or Purchasing Raised Beds
I’ve built my own beds and bought pre-made ones, and I’ve been happy with both choices. The wooden beds I built have been in the garden for more than five years. They look a little weathered, but they’re still holding up well. Wood is affordable and easy to work with, but even treated lumber will eventually break down and need repairs or replacement.
My prefabricated metal beds have been out in the garden for about four years and show almost no wear. They cost more than wood, but the durability has been worth it. Metal isn’t immune to rust in the very long term, but with proper care it holds up to the elements better than wood.
The choice really comes down to your comfort level. If you enjoy DIY projects and want to save some money, wooden beds are a great option. If you’d rather have something you can assemble quickly and rely on for years, metal is the way to go.
For those who want to try building their own, I recommend this excellent tutorial from Huw Richards: How to BUILD, FILL and PLANT a Raised Bed | Grow Your Own Food.
Plant Limitations
Some gardeners worry that raised beds limit what you can grow. Potatoes, for example, are often planted in mounds, and vining crops like squash or cucumbers can sprawl beyond the edges. The truth is, you can grow all of these in raised beds with a few adjustments.
Potatoes do just fine with modified techniques, and vining crops thrive if you give them support. Trellises, cages, or other vertical growing methods keep the vines contained, healthier, and easier to manage. Going vertical also reduces powdery mildew and helps protect against pests like vine borers.
I’ll be sharing more about vertical growing methods in a future post, so stay tuned. And if you’re following along on social media, you won’t miss the update.
Are Raised Beds Right for You?
Raised beds are a bigger financial commitment, but they come with plenty of rewards. They are easier on your knees and back, and they simplify soil management, giving you more control over conditions for each plant. Raised beds also make it easier to keep weeds, pests, and disease in check.
If your budget is tight and your native soil is already fairly good, in-ground gardening might be the better choice. And if your soil is poor and your budget is limited, containers, self-watering buckets, or grow bags can be affordable alternatives. We’ll cover those in more detail later in this post.
At the end of the day, the best method is the one that gets you planting and learning. Start with what fits your situation, and expand from there.
Containers, Grow Bags, and Self-Watering Options
Not every gardener has the space, budget, or need for raised beds or in-ground plots. That doesn’t mean you’re out of options. Containers, grow bags, and self-watering systems are all flexible, beginner-friendly ways to grow vegetables, herbs, and even fruit in small spaces. Each method has its own strengths and quirks, and many gardeners — myself included — use more than one at a time.
Let’s walk through the options so you can see which ones might fit your garden and your lifestyle.
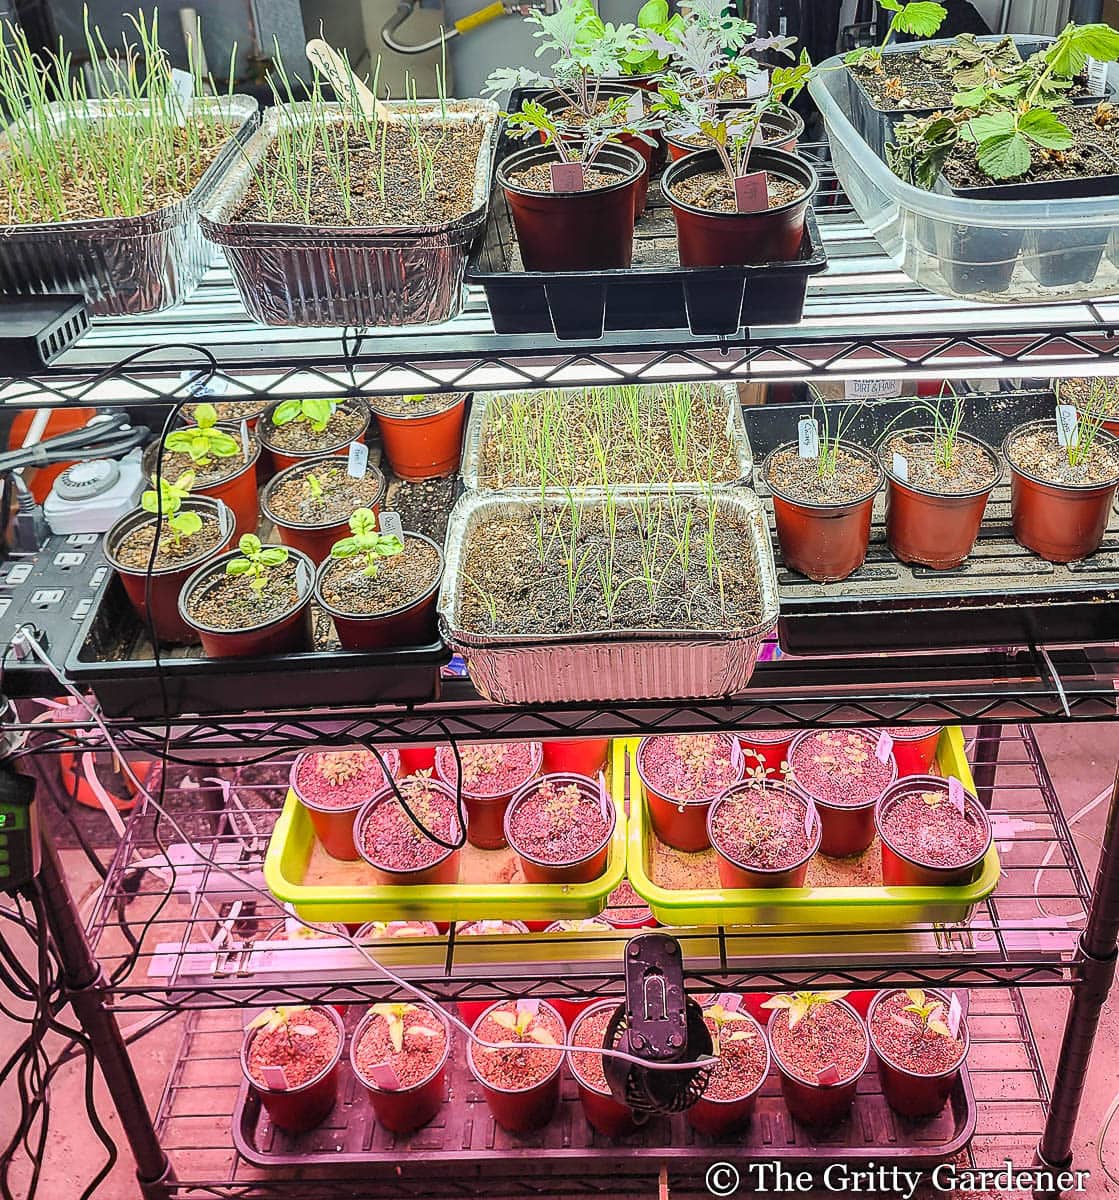
Containers: Versatile and Adaptable

Container gardening is one of the most adaptable ways to grow food and has been around for thousands of years. From the days of ancient Egypt and Mesopotamia to today’s balconies and patios, people have relied on pots and containers to make the most of limited space. The idea hasn’t changed much: fill a vessel with soil, add drainage holes so water doesn’t sit and cause root rot, and you’ve got yourself a mini-garden.
The advantages of containers are clear. They fit almost anywhere: a sunny balcony, a patio, or even a driveway. Because you’re not tied to the ground, you can move them with the seasons to catch more sunlight or shift them closer to the kitchen for easy harvests. I’ve grown herbs in small ceramic pots by the back door, and I’ve also used five-gallon buckets for tomatoes and potatoes. Both worked beautifully.
Containers also give you the same kind of soil control that raised beds do. You decide what mix goes inside, which means you can create perfect conditions for whatever you’re growing. Elevating your containers off the ground helps cut down on pests and disease, and it makes gardening a little easier on your back and knees. Even weeding is simpler in a container because you can spot and pull invaders quickly.
Of course, container gardening has its trade-offs. Smaller volumes of soil dry out quickly, especially in summer heat, so you need to keep a close eye on moisture. Root space is limited, which can stunt growth if the container is too small. And since your soil is isolated from the natural ecosystem, you’ll need to amend it regularly with compost or fertilizers to replace the microbes and nutrients that would normally cycle through. Containers can also be pricey once you add up the pots, soil, and amendments. Large, sprawling plants like pumpkins or corn don’t really fit the format.
That said, I’ve grown plenty of crops successfully in containers: tomatoes, potatoes, zucchini, cucumbers, peppers, and a wide range of herbs. Basil, chives, rosemary, oregano, and thyme have all thrived for me in containers, and I recommend them to anyone just starting out. Even a small collection of pots on a porch or patio can give you fresh herbs to use in the kitchen year-round.
Despite the drawbacks, container gardening remains one of the best solutions for beginners with limited space. An apartment balcony with a handful of pots can yield fresh greens, herbs, or even tomatoes if you’re diligent about watering and feeding. By paying attention to your plants’ needs and sticking to a consistent routine, you can grow amazing food and flowers in surprisingly small spaces.
Grow Bags: Flexible and Portable

Sometimes you need a versatile and portable way to grow vegetables without the big investment of raised beds or the space that in-ground gardening requires. This is where grow bags shine.
I’ve had a lot of success growing potatoes and tomatoes in grow bags. My paste tomatoes go in raised beds, while my cherry and heirloom slicers thrive in grow bags. This method has been very productive, and each year I learn a little more about how to get the most from it. One change that made a huge difference was adding drip irrigation to my tomato area — it kept the moisture consistent and freed up time to focus on other parts of the garden.
Grow bags bring some real advantages. Their porous fabric gives roots better airflow and allows excess water to drain, reducing the risk of root rot. They’re also lightweight, so it’s easy to move them around when needed. When the season ends, they fold up neatly for storage. Cost-wise, they’re a budget-friendly option; a dozen bags often costs about the same as building a single self-watering bucket. And because you fill them yourself, you don’t need to spend hours amending poor native soil — a good compost mix with a little perlite or vermiculite is usually all you need. Even better, once the season is over, the soil can be repurposed to top off raised beds or prep for cover crops.
Of course, grow bags have their drawbacks. Because they’re breathable, they also dry out quickly, which means more frequent watering. They wear out faster than traditional pots, so over time the savings may even out. They’re not the prettiest option, and in humid climates algae and mold can build up on the fabric. Since most aren’t biodegradable, worn-out bags eventually end up in landfills. Pests like squirrels and mice sometimes chew through them, and if the soil becomes hydrophobic, water can run straight out the sides instead of soaking in.
Despite these challenges, I’ve found grow bags to be productive and easy to use. Checking soil moisture regularly is extra important since they dry out so fast, but if you stay on top of that, they can reward you with generous harvests. For me, they’ve worked especially well for cherry and slicer tomatoes, though I’ve decided to scale back and no longer use them for potatoes. They may not be my long-term go-to, but they’ve been a reliable part of my gardening journey.
Self-Watering Containers: Fill It and Forget It (Almost)

Maybe you want to garden but don’t have the space for raised beds or an in-ground plot. Self-watering containers can be the perfect answer. They’re also a great supplement to an existing garden if you’re looking for low-maintenance ways to grow a few extra plants.
These containers are designed with a growing area on top and a water reservoir below. Moisture wicks upward into the soil, giving plants steady hydration without constant monitoring. You can build your own with a couple of buckets and some simple materials, or buy ready-made versions that range from basic plastic tubs to more polished, elevated planters.
What makes self-watering containers so appealing is their efficiency. Because the soil only pulls up water as needed, very little is wasted through runoff or evaporation. Roots also grow deeper as they seek out the steady supply, often resulting in stronger, healthier plants. The design helps reduce the risk of overwatering since the soil wicks up just what it needs. And perhaps best of all, they save you time. Instead of daily watering, you may only need to refill the reservoir a couple of times a week. That convenience really pays off during busy stretches or hot summer months.
Certain crops thrive in these conditions. I’ve had great success with tomatoes, peppers, and cucumbers, and many gardeners also use them for peas or other vegetables that appreciate consistent moisture.
Of course, no system is perfect. Some plants — like beans, lavender, or squash — prefer to dry out a bit between waterings and won’t be as happy in this setup. The reservoir can sometimes attract mosquitoes, though a dunk or mesh barrier usually solves that problem. Because the soil stays moist, root rot is a risk if you don’t manage things well. Sediment can also build up in the reservoir, which means draining and cleaning it from time to time. And in very wet climates, excess rain can overwhelm the container and drown your plants.
There’s also the cost to consider. Self-watering containers tend to be more expensive upfront than regular pots, and since some nutrients can leach into the reservoir, you’ll need to fertilize a little more often.
Still, for anyone with limited space or limited time, self-watering containers can be an excellent option. They reduce the daily work of watering, give plants steady access to moisture, and let you grow productive crops in places where traditional gardening isn’t practical. With a little maintenance and an eye on soil health, they can become one of the most reliable tools in your gardening toolkit.
In-Ground Gardening: The Traditional Approach
Growing directly in the soil is the oldest gardening method, used for thousands of years. Gardeners today still benefit from centuries of trial, error, and adaptation.
Large-scale farms still rely on this method because it allows tight control over fertilization, pest management, and irrigation. But that control often comes at a cost: heavy use of chemical fertilizers, herbicides, and pesticides has damaged ecosystems and reduced populations of pollinators and other beneficial insects.
Luckily, backyard gardeners don’t have to follow those practices. By using sustainable, organic methods, we can build healthier soil, grow abundant crops, and create spaces that support pollinators and wildlife in our own neighborhoods.
Advantages of In-Ground Gardening
One of the biggest draws of in-ground gardening is cost. Unlike raised beds or containers, you don’t need to buy lumber, metal frames, or soil to get started. With a little work, you can turn a patch of grass into a productive garden space.
Another strength is how closely in-ground gardens connect to the natural ecosystem. Healthy soil is alive with earthworms, fungi, and microbes that support plant growth. When you cultivate directly in the ground, you’re tapping into that existing web of life.
In-ground gardens also give you freedom of design. You’re not limited to rectangles or prefabricated shapes. You can create long rows, sweeping curves, or irregular beds that make the most of your space.
Challenges of In-Ground Gardening
The biggest hurdle is soil quality. Many yards have compacted, rocky, or nutrient-poor soil that needs conditioning before it will support healthy plants. Amending with compost, manure, or other organic matter takes time and effort.
Accessibility is another factor. Since plants are at ground level, you’ll spend more time bending, kneeling, or crouching compared to raised beds or containers. Tools like knee pads or a small garden stool can make this easier.
Water management can also be tricky. Heavy clay soil may hold too much moisture, while sandy soil drains too quickly. Both extremes can stress plants and require more frequent adjustments.
And finally, compaction is always a risk, especially if you walk on your garden beds. Over time, compacted soil reduces airflow, limits root growth, and makes drainage worse.
My Experience with In-Ground Gardening
One of the main reasons I rely on raised beds and containers is the soil here in the Treasure Valley of Idaho. It’s heavy clay and naturally alkaline, which makes drainage difficult and often leads to nutrient deficiencies. That means plants need more frequent fertilizing and extra care to thrive.
In-ground gardening here isn’t impossible, but it does take patience and a lot of soil work. You’ll need to condition and amend regularly with compost or organic matter to create a well-draining, fertile base. And those efforts aren’t one-and-done — maintaining soil health is an ongoing process.
That said, in-ground gardening remains one of the least expensive ways to get started. If you’re fortunate to have decent soil to begin with, this method can be a rewarding and practical entry point into gardening.
No-Till Could be the Answer
No-till gardening is all about disturbing the soil as little as possible. By leaving its natural structure intact, you create a healthier environment for microbes, earthworms, and fungi that support strong plants.
This method works best in areas with fertile, well-draining soil, but it can be adapted almost anywhere with enough time and patience. The principle is simple: mimic nature by layering organic matter on top of the soil. Over time, nutrients filter down, building rich, fertile ground. If your soil is poor to start with, no-till is still possible. It just requires a longer commitment before results really show.
Here’s a simple way to get started:
- Choose a sunny spot that gets enough light for your crops.
- Make sure you have access to water without disrupting the rest of your yard.
- Mow down grass and weeds, then cover the area with a tarp for a few months.
- Gently aerate with a pitchfork or broadfork.
- Lay down cardboard or newspaper (no tape or colored inks) to suppress weeds, then water it in.
- Add 4–6 inches of well-rotted compost or manure on top.
- Finish with a thick mulch layer of leaves, straw, or wood chips.
- Plant directly into the compost and mulch, keeping stems clear of mounded material.
- Water well and set a consistent schedule for monitoring soil moisture.

I haven’t personally run a no-till garden yet, though I researched it heavily before starting mine and know several friends who swear by it. They’ve found it rewarding and worth the patience. The first season may feel slow as the soil ecosystem rebalances, but over time the payoffs are huge: healthier soil, fewer weeds, and less back-breaking labor.
If your soil is poor or compacted, no-till might take longer to establish. In those cases, you may want to start with raised beds, containers, or grow bags while you build up your soil naturally. But if you’re patient, no-till is one of the most sustainable ways to garden, and it will give back year after year.
What Works for You?
There’s no single “right” way to start a garden. Each method has its strengths and its challenges, and the best choice depends on your space, soil, budget, and lifestyle.
If your soil is workable, in-ground gardening can be an inexpensive way to get started. Raised beds offer more control and structure, though they require more investment up front. Containers, grow bags, and self-watering options make gardening possible almost anywhere, even on a small patio or balcony.
What matters most is choosing a method that feels manageable and enjoyable for you. Start with what you have, learn as you go, and don’t be afraid to adjust as your garden (and your confidence) grows.
Gardening is more than just producing food. It’s about slowing down, noticing the seasons, and finding joy in nurturing life. Whether you’re tending a single pot of herbs or building a backyard filled with raised beds, you’re part of a tradition that connects millions of gardeners worldwide.
So go ahead—plan something amazing, dig in, and enjoy the process. And if you’d like to keep learning alongside me, follow along on social media for more tips, experiments, and stories from the garden.